This information tells how builders can combine passkey-based authentication to increase safety and person expertise. It covers the server and consumer setup for implementing passkeys manually, additionally exhibiting how Descope simplifies this course of with a clear interface and pre-built flows for simple setup.
This tutorial was written by Kumar Harsh, a software program developer and technical creator based mostly in India. You’ll be able to go to his web site to see extra of his work!
Incorporating passkeys into your utility’s authentication course of can considerably enhance safety and person comfort. This developer’s information supplies you with a complete overview of the steps required to implement passkeys, from preliminary setup to last deployment. By following these pointers, you may create a seamless and safe authentication expertise in your customers, decreasing the chance of unauthorized entry and enhancing total belief in your utility.
Passkey authentication TLDR
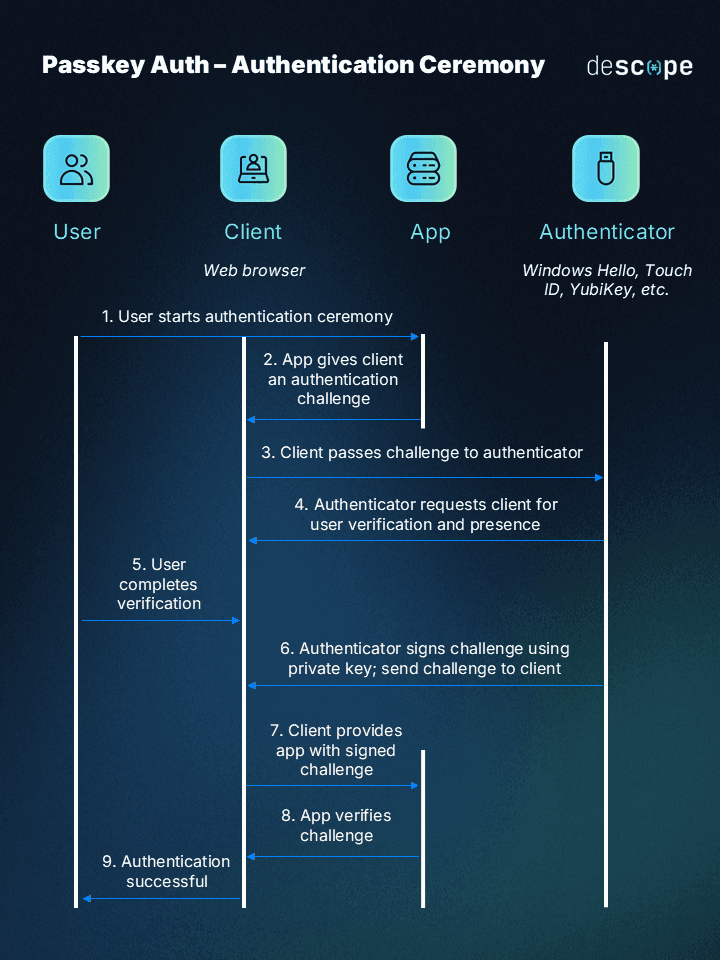
Not like passwords, that are weak to brute pressure assaults and phishing scams, passkeys leverage the facility of public-key cryptography to enhance each UX and safety. Think about a vault the place your identification is locked away, accessible solely with a singular key pair. Passkeys operate equally to this, with every person possessing a non-public key, the grasp key stored securely on their system, and a public key shared with web sites.
When logging in, the web site sends a problem, a digital puzzle, to the person’s system. The personal key then creates a singular signature, a digital fingerprint, proving your identification with out revealing the precise key. This ensures your login stays safe even when the web site is compromised.
Right here’s a fast diagram that can assist you higher perceive the method:
Easy methods to implement passkeys
Whereas the idea of passkeys sounds very thrilling, passkeys are fairly complicated to implement from scratch. On this part, you’ll be taught how one can implement passkey authentication from scratch after which see how Descope) makes this course of a lot easier.
Implementing passkeys in an app with out utilizing third-party libraries is technically potential. Nevertheless, it’s extremely discouraged as a result of complexity of the setup and the safety dangers concerned. It’s greatest to choose one of many supported libraries and observe its docs to implement passkeys in your app.
On the whole, the implementation requires you to do the next:
- Server-side setup: It’s essential implement key era, signature verification, and attestation dealing with on the server. You additionally have to combine with a database or person administration system to retailer and retrieve person info and passkey credentials.
- Frontend integration: As soon as the server is about up, you need to use JavaScript’s navigator.credentials.create() and navigator.credentials.get() strategies to provoke registration and authentication flows on the consumer. The consumer must information customers by means of interactions with their authenticator system (e.g. fingerprint scan, PIN entry, and one other system) and ship registration and authentication knowledge to your server for processing.
It’s greatest to utilize a trusted library, corresponding to SimpleWebAuthn, to simplify this course of. The library takes care of implementing the important thing era and dealing with for you and makes the method rather a lot easier than doing it from scratch.
Should you’re desirous about studying find out how to use SimpleWebAuthn to implement passkeys in your venture from scratch, you may check out this instance venture. This venture consists of a React-based consumer and a Node.js + Categorical–based mostly server.
Server-side setup
The server makes use of the @simple-webauthn/server package deal to reveal 4 necessary endpoints:
- /generate-registration-options: This endpoint configures and generates the record of accessible registration choices for the consumer. It makes use of the presently logged-in person’s particulars to make sure the identical system doesn’t register a number of instances. It additionally generates and sends a problem that the consumer can use to register the brand new system.
- /verify-registration: This endpoint verifies if the on-device registration was profitable. Upon profitable verification, the person’s registration particulars (their public key, credential ID, and system info) are saved within the database.
- /generate-authentication-options: This endpoint returns the accessible authentication choices for a person. The server seems to be up the gadgets desk on this step and retrieves the system ID for the registered system of the person to permit authenticating by means of that system.
- /verify-authentication: This endpoint is used to confirm if the on-device authentication was profitable. It additionally verifies if a registered system was used to authenticate.
This server implementation assumes you could have carried out a easy preliminary authentication to establish the person and picked up their inside ID (corresponding to a UUID) to set off the registration and authentication flows. In sensible eventualities, you’ll want to implement this step your self and plug within the person ID within the loggedInUserId variable on this code.
One other level to notice is that this implementation presently doesn’t embrace an integration with a database to retailer and retrieve person credentials. That is one other process so that you can handle when trying to take this to manufacturing. The addition of a person authentication database additionally requires further upkeep.
Shopper-side setup
The client-side implementation for this technique is comparatively easier. It’s essential arrange two buttons: One to set off registration for passkeys and the opposite to set off authentication.
Within the onRegistrationStart occasion, you’ll want to make a request to the /generate-registration-options endpoint to first fetch the authentication configuration from the backend. You then use these choices to start out the registration ceremony on the frontend utilizing the startRegistration() operate from the @simple-webauthn/browser package deal.
After getting a profitable response from the startRegistration() name (i.e. the passkey era on the system is accomplished efficiently), you then make a request to the /verify-registration endpoint to confirm if the registration was profitable utilizing the response returned from the startRegistration() name. The server verifies the registration consequence and shops the system particulars within the database after a profitable registration.
When authenticating, the logic is comparable. You make a request to the /generate-authentication-options endpoint and name the startAuthentication() technique from the @simple-webauthn/browser package deal with the response returned from the backend server. This initiates the on-device verification for the person and generates an intermediate response. You then ship this response to the /verify-authentication endpoint to finish the authentication course of and grant the person entry to the appliance.
As you may see, this technique is kind of complicated and requires further setup and upkeep for person identification and authentication knowledge storage. Additionally, if you’re trying to deploy this over HTTPS, you’ll want to observe further steps outlined within the SimpleWebAuthn Docs to make sure safety.
So let’s now see find out how to simplify passkey implementation with Descope and save your self the headache.
Implementing passkeys the easier means with Descope
As an alternative of establishing passkeys from scratch and even going by means of the trouble of studying how a devoted third-party library for passkeys works, you may be higher off with an answer like Descope that may enable you to implement passkeys together with different modes of authentication all by means of a simplified no-code interface.
Creating Descope Flows
To strive it out, head over to Descope’s web site and join a free ceaselessly account. After getting entry to their developer dashboard, you can begin creating your auth flows. Click on Getting Began within the left navigation panel:
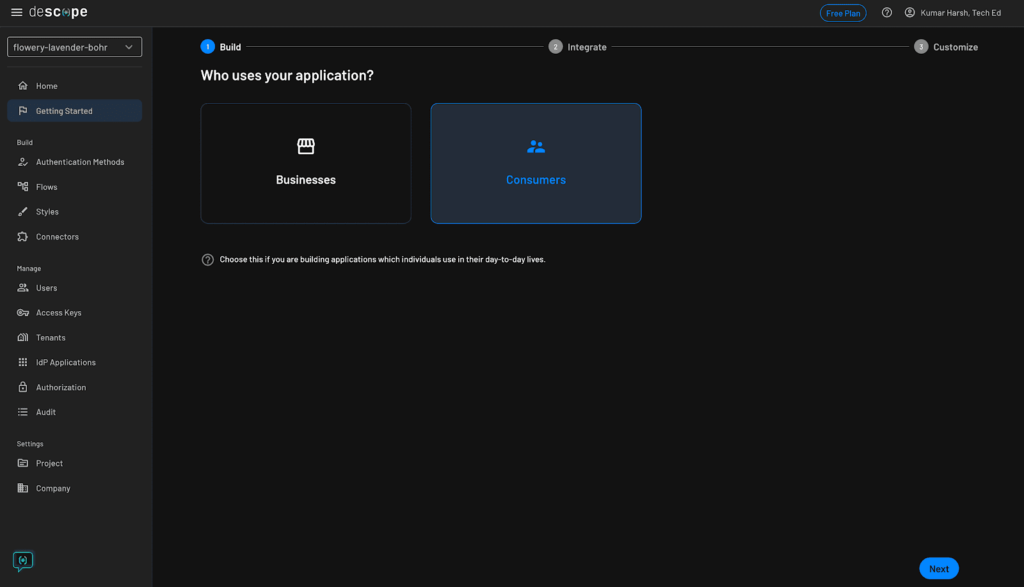
Click on Customers to start out constructing auth flows for user-facing purposes. Then click on the blue Subsequent button on the backside proper.
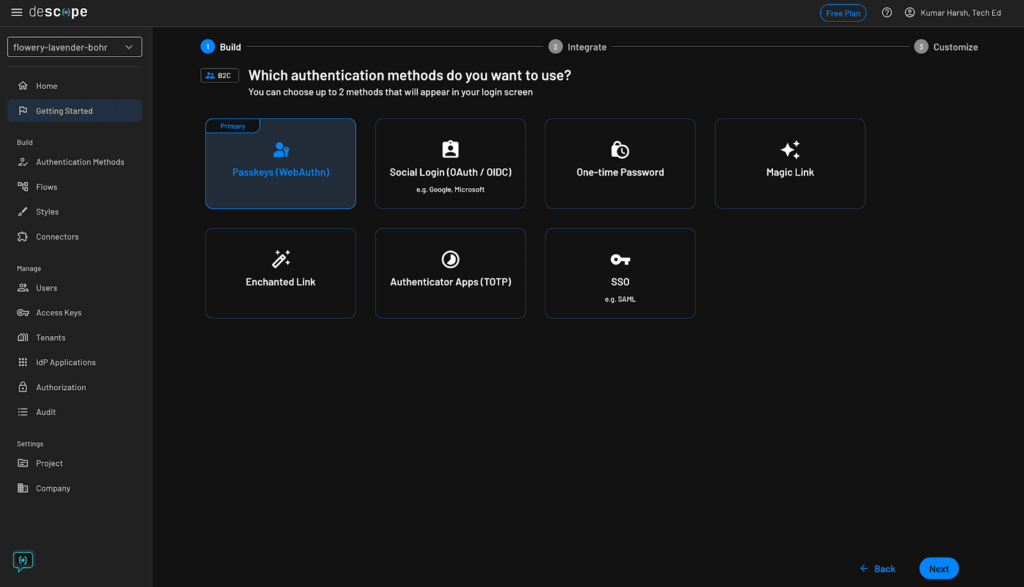
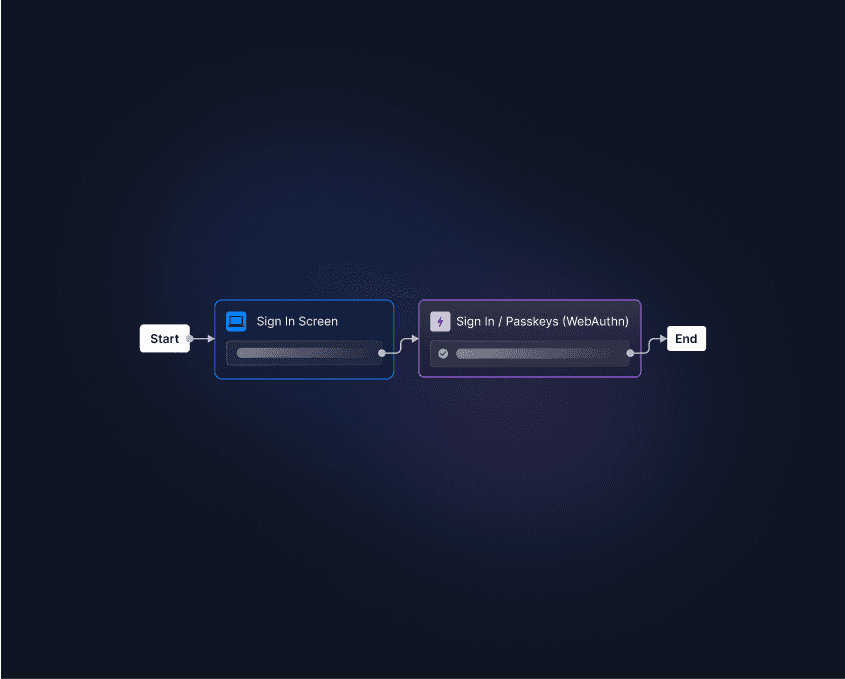
On the subsequent display, select Passkeys (WebAuthn) as the first authentication technique and click on the blue Subsequent button:
On the subsequent display, you may select an extra authentication technique to make use of as a part of a 2FA circulate:
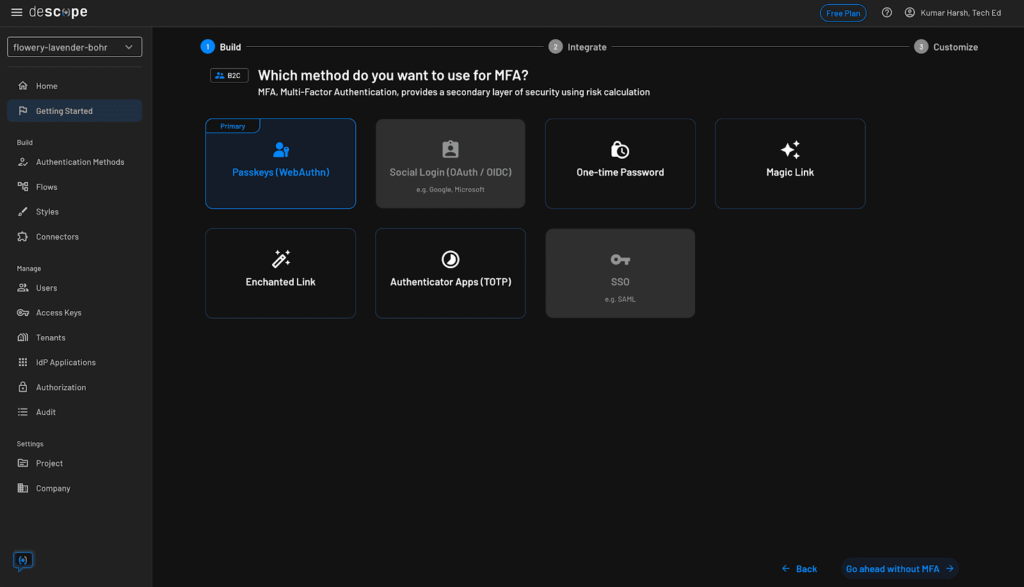
You’ll be able to skip this step by clicking on the Go forward with out MFA button on the backside proper. Then you’ll want to select a login display, which could embrace an extra technique of registration to permit customers to enroll and arrange passkeys on their system earlier than they’ll begin utilizing them:
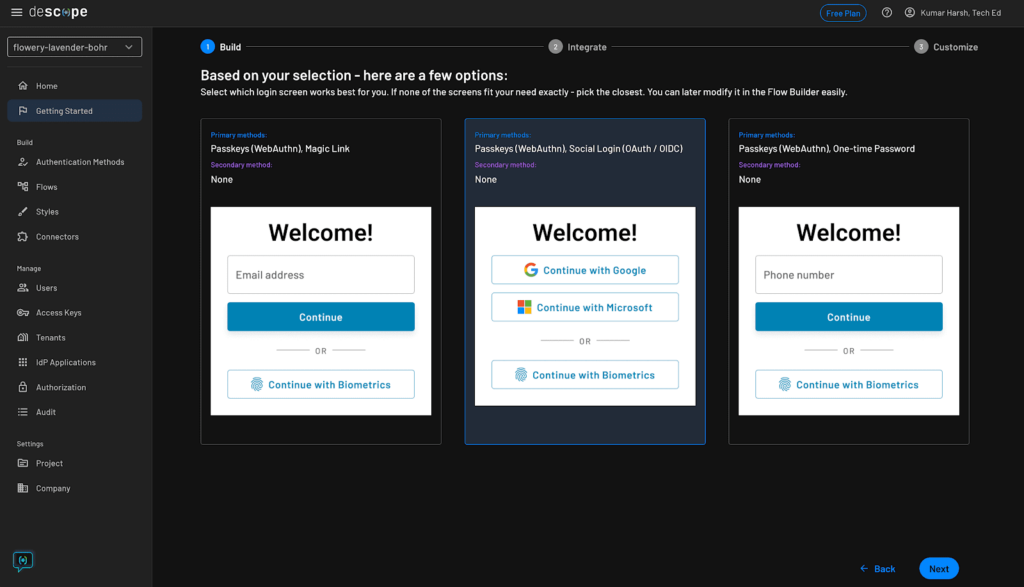
Be at liberty to decide on any login display on this step. Lastly, click on the Subsequent button to preview your decisions. If the whole lot seems to be good, click on the Subsequent button. Descope will now create your auth flows and supply a pattern code snippet to get began with them:
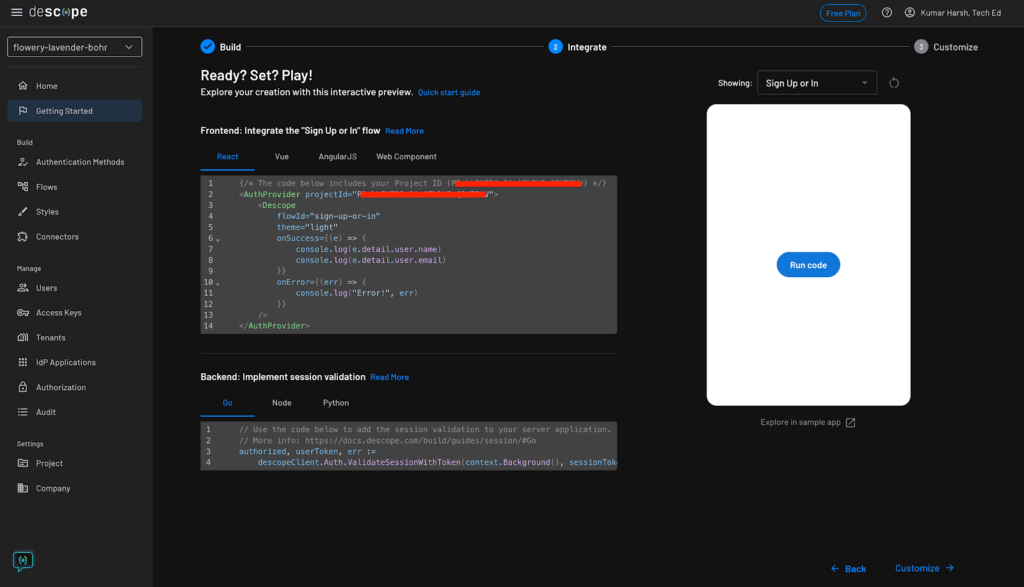
The code snippet comprises your venture ID. You solely want the venture ID to configure the Descope consumer or server SDKs to make use of your auth flows in your apps.
Organising a React venture
To check out your Descope flows, create a brand new React venture regionally by working the next command:
Select React because the framework, select JavaScript because the language, and identify your venture (e.g. passkeys-descope).
As soon as the venture is prepared, you’ll want to set up the React Descope SDK by working the next command:
npm set up @descope/react-sdkThat’s all of the setup you want. Now you may get began with writing the code for integrating your auth flows.
It’s essential make modifications to 2 recordsdata to combine Descope into your venture. Initially, you’ll want to arrange the Descope AuthProvider in the principle.jsx file to permit accessing the authentication logic all through the app. To try this, exchange the code in primary.js with the next:
import React from 'react';
import ReactDOM from 'react-dom/consumer';
import App from './App';
import { AuthProvider } from '@descope/react-sdk';

const root = ReactDOM.createRoot(doc.getElementById('root'));
root.render(
    <React.StrictMode>
        <AuthProvider
            projectId=''
        >
            <App />
        </AuthProvider>
    </React.StrictMode>
);
Now you can use Descope elements and hooks to arrange authentication in your app as you want. Right here’s a easy instance implementation you need to use to check out the passkeys auth circulate in your app:
import { useCallback } from 'react'

import { useDescope, useSession, useUser } from '@descope/react-sdk'
import { Descope } from '@descope/react-sdk'

const App = () => {
  const { isAuthenticated, isSessionLoading } = useSession()
  const { isUserLoading } = useUser()
  const { logout } = useDescope()

  const handleLogout = useCallback(() => {
    logout()
  }, (logout))

  return <>
    {!isAuthenticated &&
      (<div fashion={{show: "flex", flexDirection: "column", justifyContent: "heart", alignItems: "heart", peak: "100vh"}}>
        <div fashion={{ maxWidth: "500px" }}>
          <Descope
            flowId="sign-up-or-in"
            onSuccess={(e) => console.log(e.element.person)}
            onError={(e) => console.log('Couldn't log in!')}
          />
        </div>
      </div>
      )

    }

     isUserLoading) && <p>Loading...</p>


    {!isUserLoading && isAuthenticated &&
      (
        <>
          <p>Logged in!</p>
          <button onClick={handleLogout}>Logout</button>
        </>
      )
    }
  </>;
}

export default App;
That’s it! Now you can check out the auth circulate with passkeys.
Attempting out the app
To check out the app, run the next command:
Head over to http://localhost:5173 to view the app. When signing up, you’ll want to use a social circulate or some other circulate to register a brand new person and arrange a passkey on their system. Click on on both the Proceed with Google or Proceed with Microsoft based mostly in your choice and choose an account.
When you do, you’ll be requested to offer further particulars, corresponding to your identify, as a part of the registration course of:
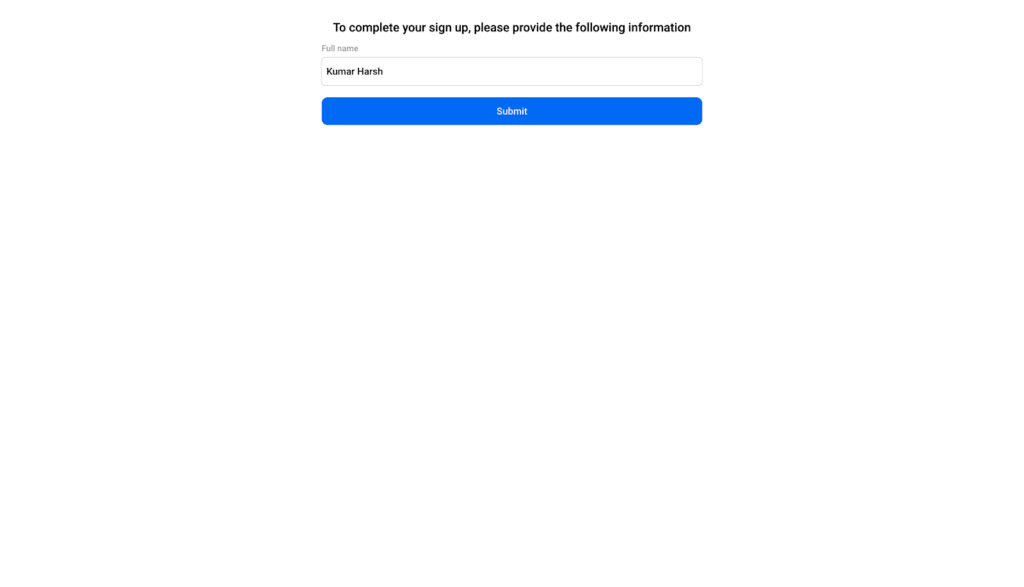
Subsequent, you’ll be requested if you wish to arrange passkeys for this account:
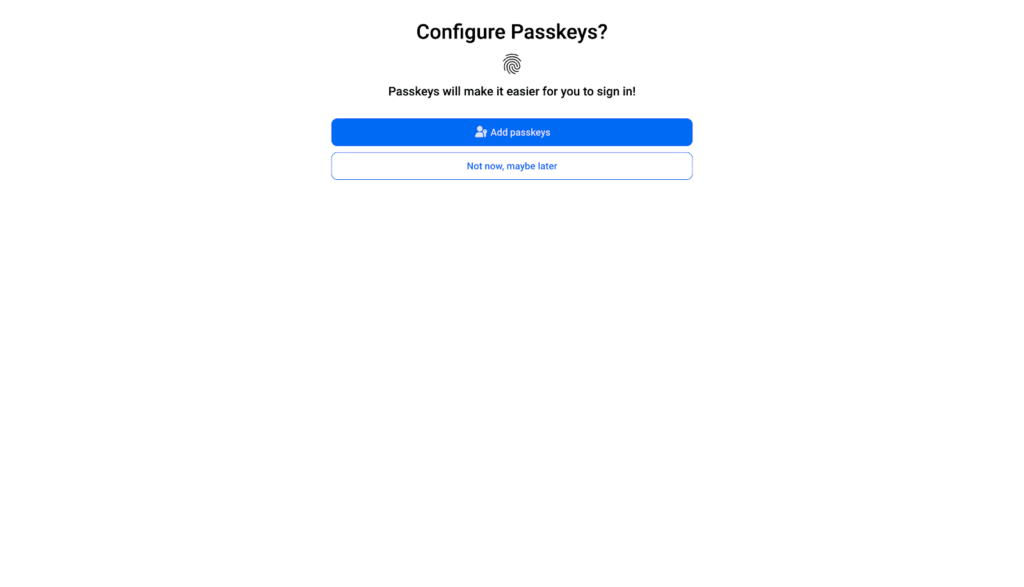
Click on the blue Add passkeys button. Chrome will then ask you to substantiate the creation of the passkey:
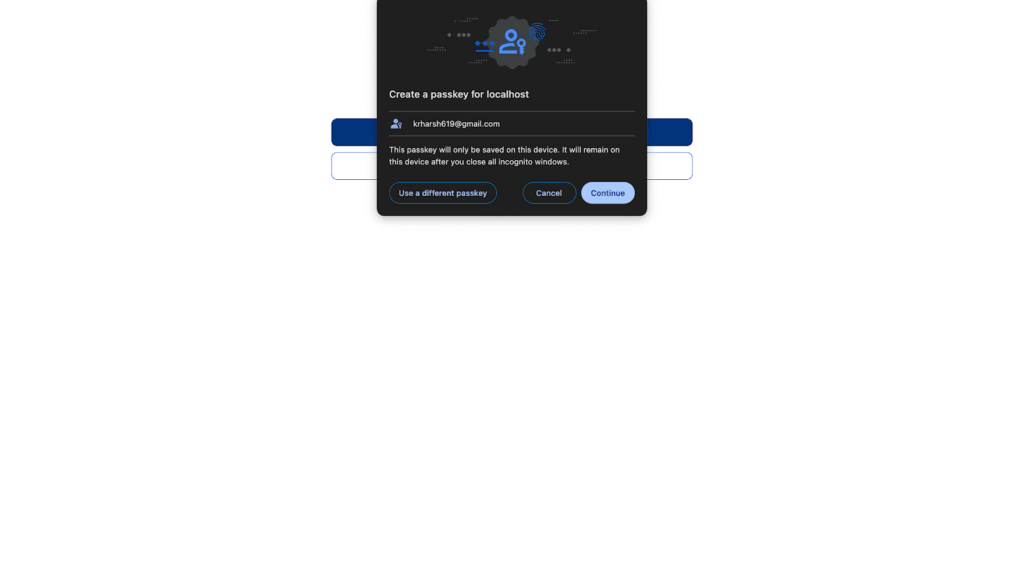
When you click on Proceed, you’ll be requested to confirm your identification by means of system login, corresponding to biometric (Contact ID) or system PIN (in case you have set that up):
When you’ve verified your account, together with passkeys, will likely be arrange, and you’ll be logged in:

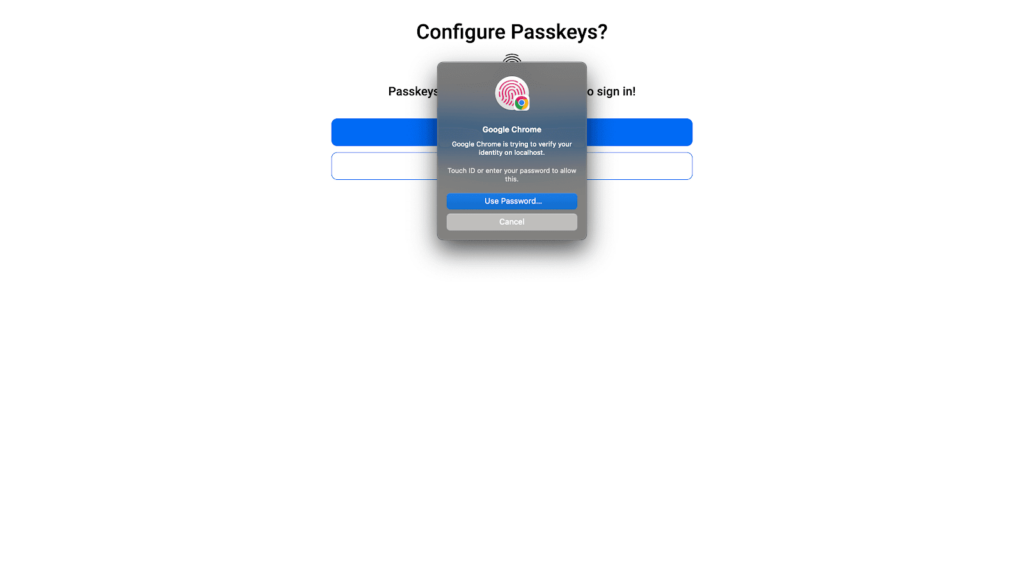
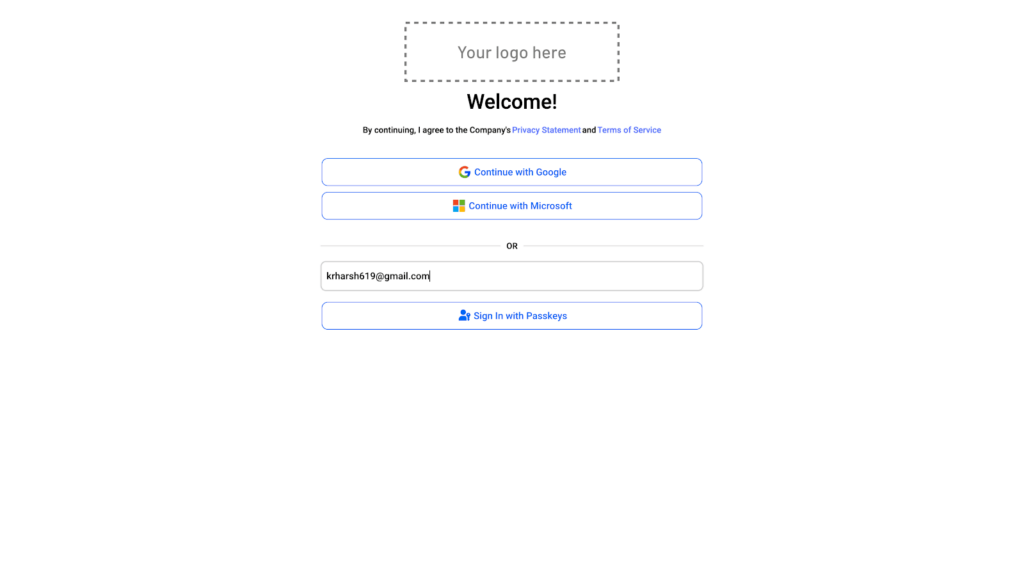
Now you can strive logging in with passkeys. To try this, click on on the Logout button and enter your person ID (which, on this case, is your e mail) within the passkeys enter field:
When you click on the Check in with Passkeys button, you’ll be requested to confirm your identification in your system to entry your regionally saved passkeys:
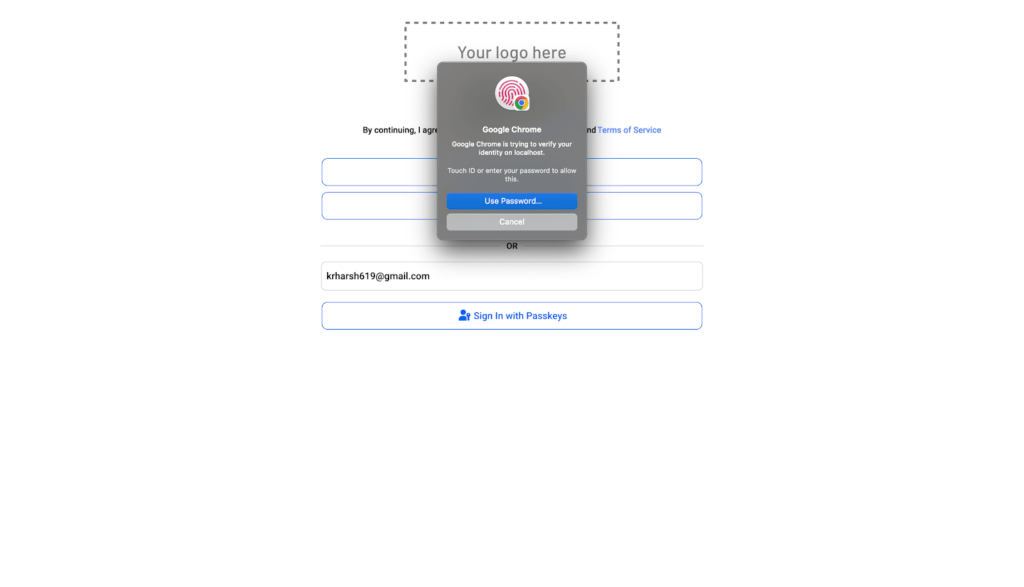
When you confirm your identification, you’ll be logged in instantly with out the necessity to enter any app-specific passwords or PINs!
Moreover, it’s also possible to allow autofill with passkeys to offer a good nicer login expertise to your customers. To try this, navigate to the Signal Up or In circulate in your Descope dashboard and navigate to the Welcome Display screen web page:
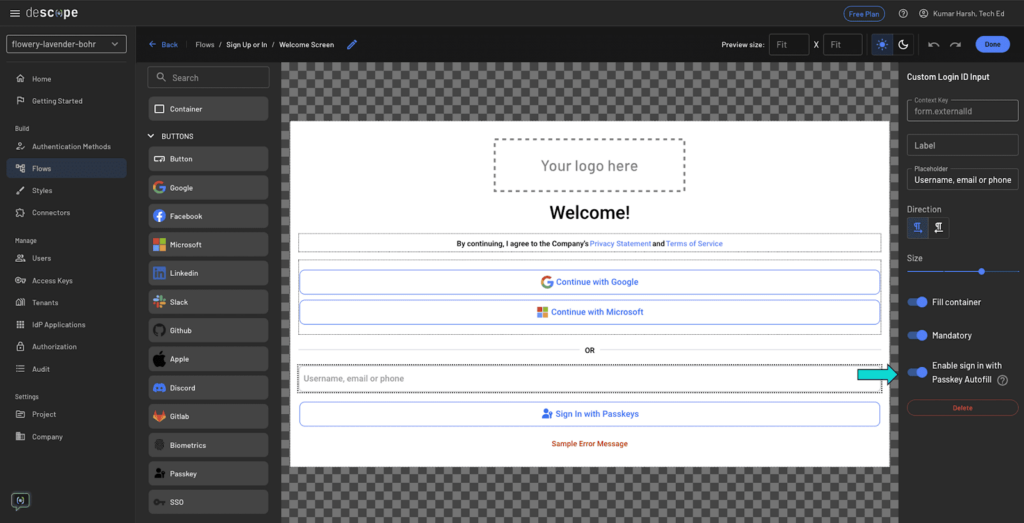
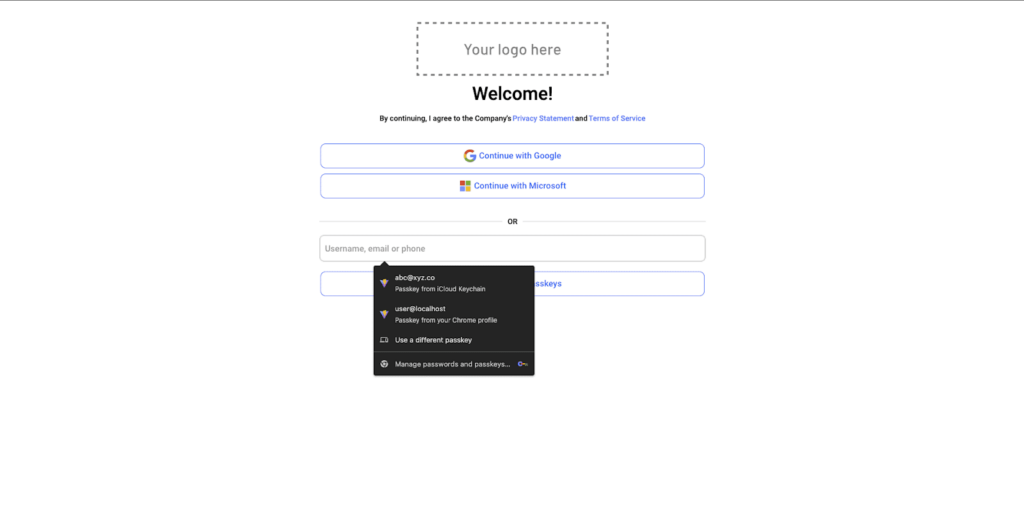
On this web page, toggle Allow sign up with Passkey Autofill in the fitting pane and click on on Carried out > Save on the prime proper. This may allow autofill choices within the Passkey enter field. To try it out, navigate to the login display and click on on the passkey enter field. It is best to see an autofill record just like the next:
Yow will discover the whole code for the app constructed on this tutorial on this GitHub repo.
Drag-and-drop passkey authentication with Descope
Descope simplifies the implementation of passkeys in your apps, eliminating the necessity to manually arrange complicated client- and server-side authentication logic from scratch. It provides a visible workflow for managing user-facing screens for progressive profiling, backend authentication logic, and the merging of person identities throughout totally different authentication strategies.
This strategy not solely makes it simple to get began but in addition simplifies the method of modifying your person journeys over time.
Descope provides intuitive instruments and clear directions, empowering builders from all ability ranges to combine safe, seamless login processes into their purposes. With drag-and-drop capabilities, even inexperienced persons can simply implement authentication flows that allow faster, easier, and extra accessible logins for customers.
Take a look at Descope by signing up for a Free Ceaselessly account. When you’ve got questions, guide time with Descope auth consultants to be taught extra.