On this tutorial, we are going to create a generative art work impressed by the unbelievable Brazilian artist Lygia Clarke. A few of her work, primarily based on minimalism and geometric figures, are good to be reinterpreted utilizing a grid and generative system:
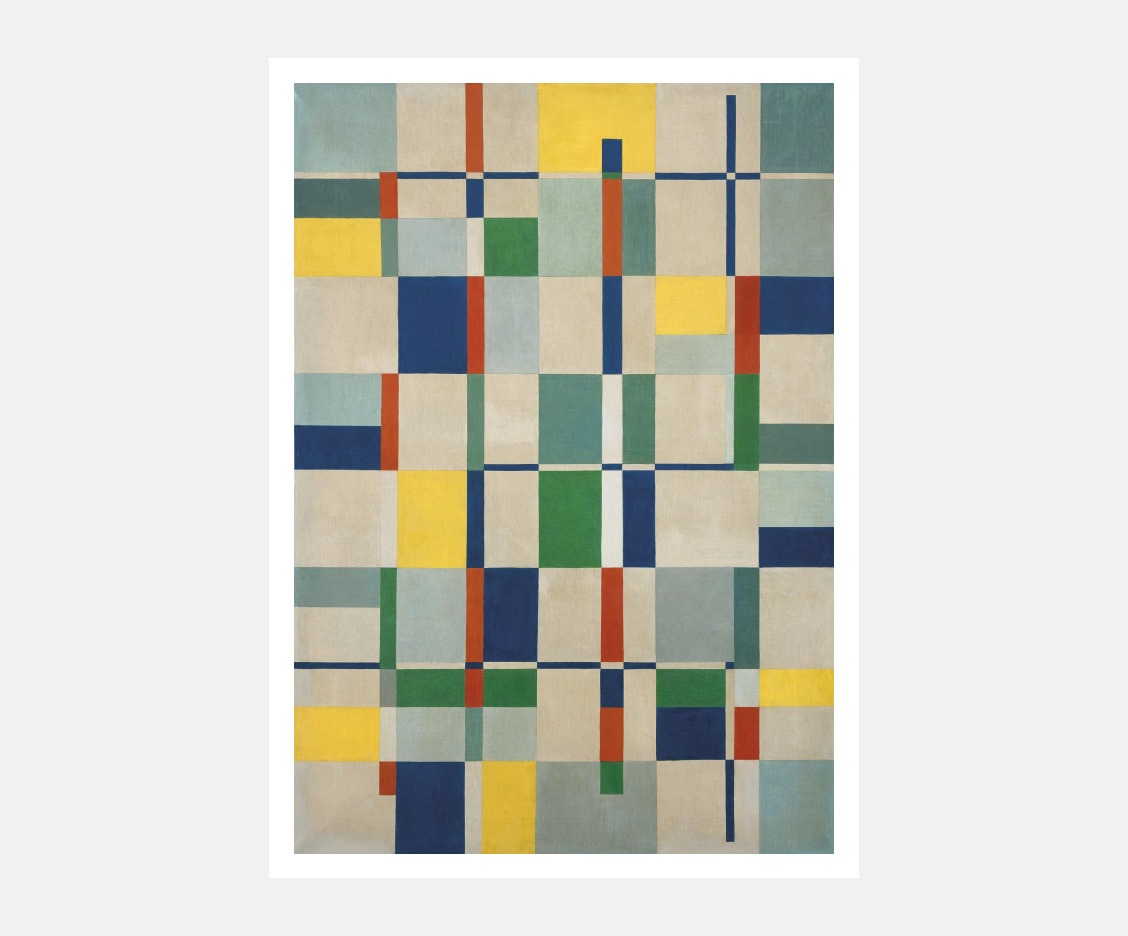
The chances of a grid system
It’s well-known, that grids are an indispensable component of design; from designing typefaces to inside design. However grids, are additionally important components in different fields like structure, math, science, know-how, and portray, to call a number of. All grids share that extra repetition means extra potentialities, including element and rhythm to our system. If for instance, we now have a picture that’s 2×2 pixels we might have a most of 4 shade values to construct a picture, but when we improve that quantity to 1080×1080 we are able to play with 1,166,400 pixels of shade values.
Examples: Romain Du Roi, Switch Grid, Cartesian Coordinate System, Pixels, Quadtree, Mesh of Geometry.
Challenge Setup
Earlier than beginning to code, we are able to arrange the undertaking and create the folder construction. I might be utilizing a setup with vite, react, and react three fiber due to its ease of use and speedy iteration, however you’re greater than welcome to make use of any software you want.
npm create vite@newest generative-art-with-three -- --template reactAs soon as we create our undertaking with Vite we might want to set up Three.js and React Three Fiber and its varieties.
cd generative-art-with-three
npm i three @react-three/fiber
npm i -D @varieties/three
Now, we are able to clear up the undertaking by deleting pointless information just like the vite.svg within the public folder, the App.css, and the property folder. From right here, we are able to create a folder referred to as elements within the src folder the place we are going to make our art work, I’ll identify it Lygia.jsx in her honor, however you should use the identify of your alternative.
├─ public
├─ src
│  ├─ elements
│  │  └─ Lygia.jsx
│  ├─ App.jsx
│  ├─ index.css
│  └─ primary.jsx
├─ .gitignore
├─ eslint.config.js
├─ index.html
├─ package-lock.json
├─ bundle.json
├─ README.md
└─ vite.config.js
Let’s proceed with the Three.js / React Three Fiber setup.
React Three Fiber Setup
Luckily, React Three Fiber handles the setup of the WebGLRenderer and different necessities such because the scene, digital camera, canvas resizing, and animation loop. These are all encapsulated in a part referred to as Canvas. The elements we add inside this Canvas needs to be a part of the Three.js API. Nevertheless, as an alternative of instantiating courses and including them to the scene manually, we are able to use them as React elements (keep in mind to make use of camelCase):
// Vanilla Three.js

const scene = new Scene()
const mesh = new Mesh(new PlaneGeometry(), new MeshBasicMaterial())
scene.add(mesh)
// React Three Fiber
import { Canvas } from "@react-three/fiber";
operate App() {
return (
);
}
export default App;Lastly, let’s add some styling to our index.css to make the app fill your complete window:
html,
physique,
#root {
  top: 100%;
  margin: 0;
}
Now, when you run the app from the terminal with npm run dev you must see the next:
Congratulations! You’ve gotten created probably the most boring app ever! Joking apart, let’s transfer on to our grid.
Creating Our Grid
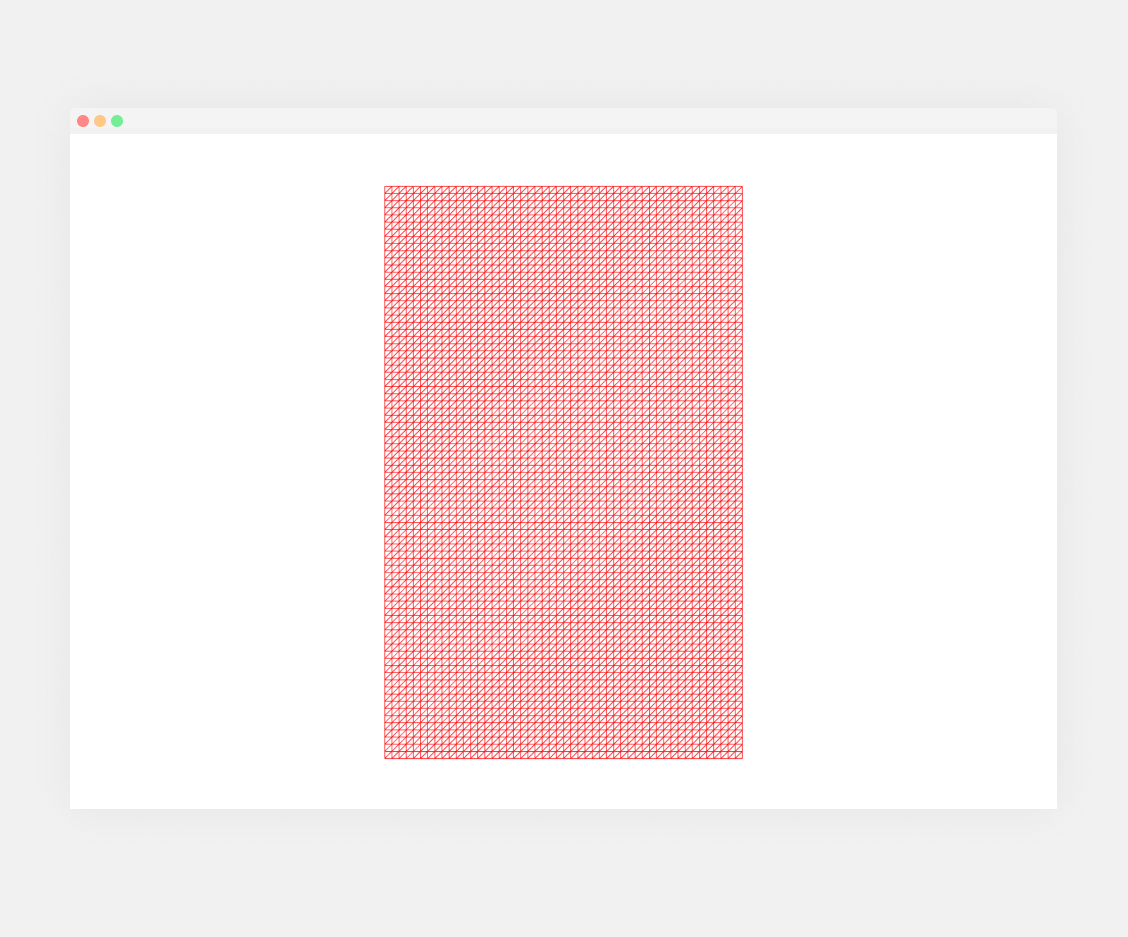
After importing Lygia’s authentic art work into Figma and making a Format grid, trial and error revealed that almost all components match right into a 50×86 grid (with out gutters). Whereas there are extra exact strategies to calculate a modular grid, this strategy suffices for our functions. Let’s translate this grid construction into code inside our Lygia.jsx file:
import { useMemo, useRef } from "react";
import { Object3D } from "three";
import { useFrame } from "@react-three/fiber";
const dummy = new Object3D();
const LygiaGrid = ({ width = 50, top = 86 }) => {
const mesh = useRef();
const squares = useMemo(() => {
const temp = ();
for (let i = 0; i {
for (let i = 0; i
A number of new issues instantly, however don’t worry I’m going to clarify what the whole lot does; let’s go over every component:
- Create a variable referred to as
dummyand assign it to anObject3Dfrom Three.js. This can permit us to retailer positions and some other transformations. We’ll use it to cross all these transformations to the mesh. It doesn’t have some other operate, therefore the identifydummy(extra on that later). - We add the width and top of the grid as props of our Element.
- We’ll use a React
useRefhook to have the ability to reference theinstancedMesh(extra on that later). - To have the ability to set the positions of all our situations, we calculate them beforehand in a operate. We’re utilizing a
useMemohook from React as a result of as our complexity will increase, we can retailer the calculations between re-renders (it’s going to solely replace in case the dependency array values replace (width, top)). Contained in the memo, we now have two for loops to loop via the width and the peak and we set the positions utilizing theito arrange thexplace and thejto set ouryplace. We’ll minus thewidthand thetopdivided by two so our grid of components is centered. - Now we have two choices to set the positions, a
useEffecthook from React, or a useFrame hook from React Three Fiber. We selected the latter as a result of it’s a render loop. This can permit us to animate the referenced components. - Contained in the
useFramehook, we loop via all situations utilizingsquares.size. Right here we deconstruct our earlierxandyfor every component. We cross it to ourdummyafter which we useupdateMatrix()to use the modifications. - Lastly, we return an
that wraps ourwireframeprop so we are able to see that could be a grid of fifty×86 squares and never an enormous rectangle.
Now we are able to import our part into our primary app and use it contained in the part. To view our total grid, we’ll want to regulate the digital camera’s z place to 65.
import { Canvas } from "@react-three/fiber";
import { Lygia } from "./elements/Lygia";

operate App() {
  return (


  );
}

export default App;
Our end result:
Breaking The Grid
One of many hardest elements in artwork, but in addition in some other topic like math or programming is to unlearn what we discovered, or in different phrases, break the principles that we’re used to. If we observe Lygia’s art work, we clearly see that some components don’t completely align with the grid, she intentionally broke the principles.
If we deal with the columns for now, we see that there are a complete of 12 columns, and the numbers 2, 4, 7, 8, 10, and 11 are smaller that means numbers 1, 3, 5, 6, 9, and 12 have greater values. On the identical time, we see that these columns have totally different widths, so column 2 is larger than column 10, regardless of that they’re in the identical group; small columns. To realize this we are able to create an array containing the small numbers: (2, 4, 7, 8, 10, 11). However in fact, we now have an issue right here, we now have 50 columns, so there isn’t a manner we are able to comprehend it. The best technique to clear up this downside is to loop via our variety of columns (12), and as an alternative of our width we are going to use a scale worth to set the scale of the columns, that means every grid might be 4.1666 squares (50/12):
const dummy = new Object3D();
const LygiaGrid = ({ width = 50, top = 80, columns = 12 }) => {
const mesh = useRef();
const smallColumns = (2, 4, 7, 8, 10, 11);
const squares = useMemo(() => {
const temp = ();
let x = 0;
for (let i = 0; i {
for (let i = 0; i
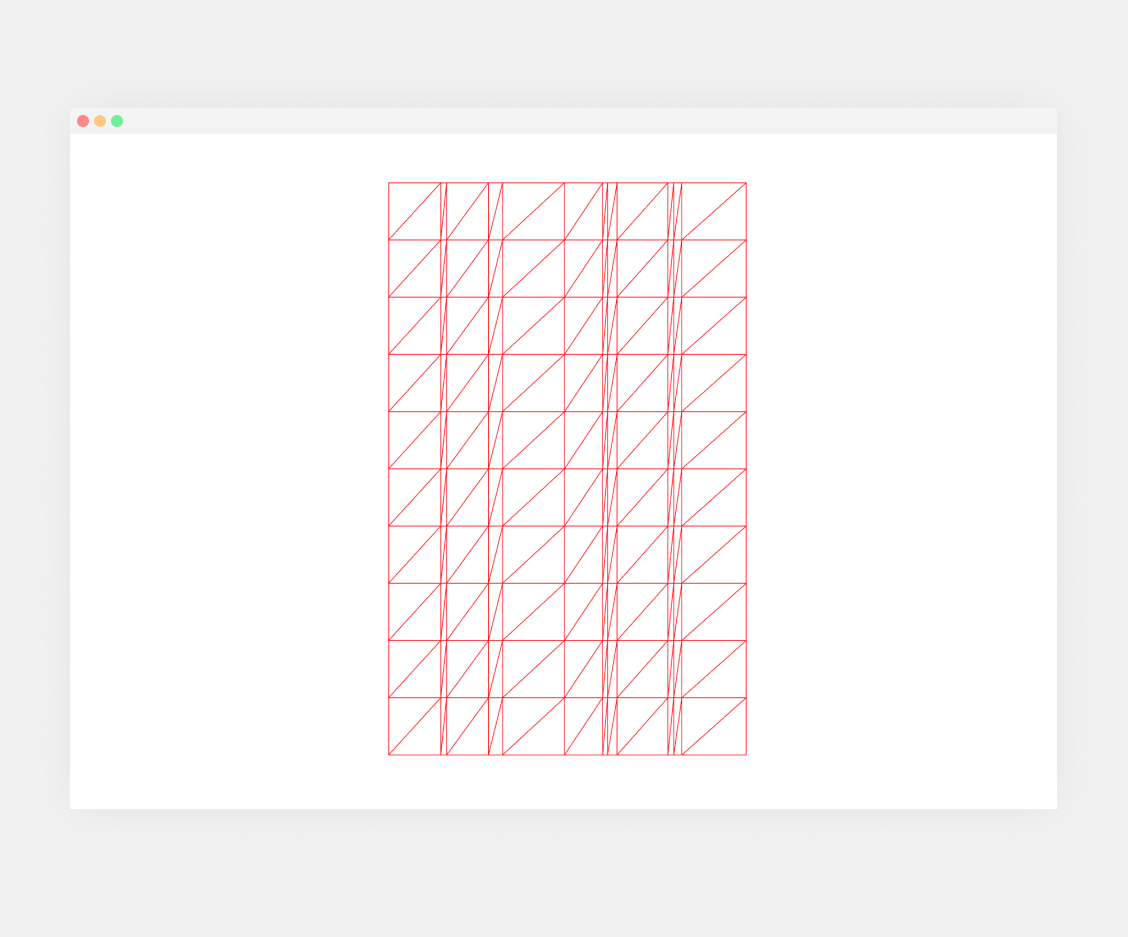
So, we’re looping our columns, we’re setting our ratio to be the grid width divided by our columns. Then we set the column to be equal to our ratio minus 2 in case it’s within the listing of our small columns, or ratio plus 2 in case it isn’t. Then, we do the identical as we had been doing earlier than, however our x is a bit totally different. As a result of our columns are random numbers we have to sum the present column width to x on the finish of our first loop:
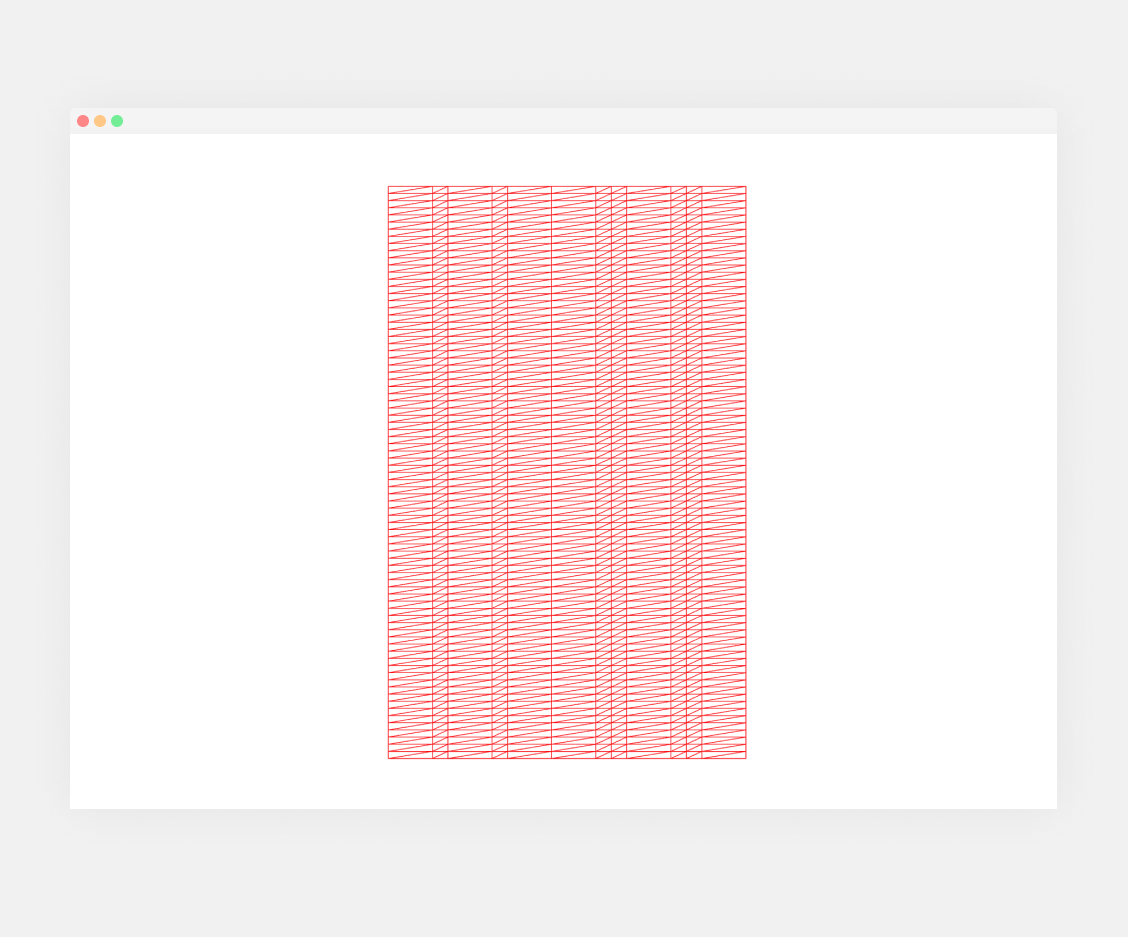
We’re nearly there, however not fairly but, we have to ‘actually’ break it. There are a whole lot of methods to do that however the one that may give us extra pure outcomes might be utilizing noise. I like to recommend utilizing the library Open Simplex Noise, an open-source model of Simplex Noise, however you’re greater than welcome to make use of some other choices.
npm i open-simplex-noiseIf we now use the noise in our for loop, it ought to look one thing like this:
import { makeNoise2D } from "open-simplex-noise";

const noise = makeNoise2D(Date.now());

const LygiaGrid = ({ width = 50, top = 86, columns = 12 }) => {
  const mesh = useRef();
  const smallColumns = (2, 4, 7, 8, 10, 11);

  const squares = useMemo(() => {
    const temp = ();
    let x = 0;

    for (let i = 0; i
First, we import the makeNoise2D operate from open-simplex-noise, then we create a noise variable which equals the beforehand imported makeNoise2D with an argument Date.now(), keep in mind that is the seed. Now, we are able to bounce to our for loop.
- We add a relentless variable referred to as
nwhich equals to ournoiseoperate. We cross as an argument the increment (i) from our loop and multiply it by5which is able to give us extra values between -1 and 1. - As a result of we might be utilizing random numbers, we have to hold monitor of our remaining width, which might be our
remaningWidthdivided by the variety ofcolumnsminus the present variety of columnsi. - Subsequent, we now have the identical logic as earlier than to verify if the column is in our
smallColumnslisting however with a small change; we use thennoise. On this case, I’m utilizing amapLinearoperate from Three.jsMathUtilsand I’m mapping the worth from(-1, 1)to(3, 4)in case the column is in our small columns or to(1.5, 2)in case it’s not. Discover I’m dividing it or multiplying it as an alternative. Attempt your values. Keep in mind, we’re breaking what we did. - Lastly, if it’s the final column, we use our
remaningWidth.
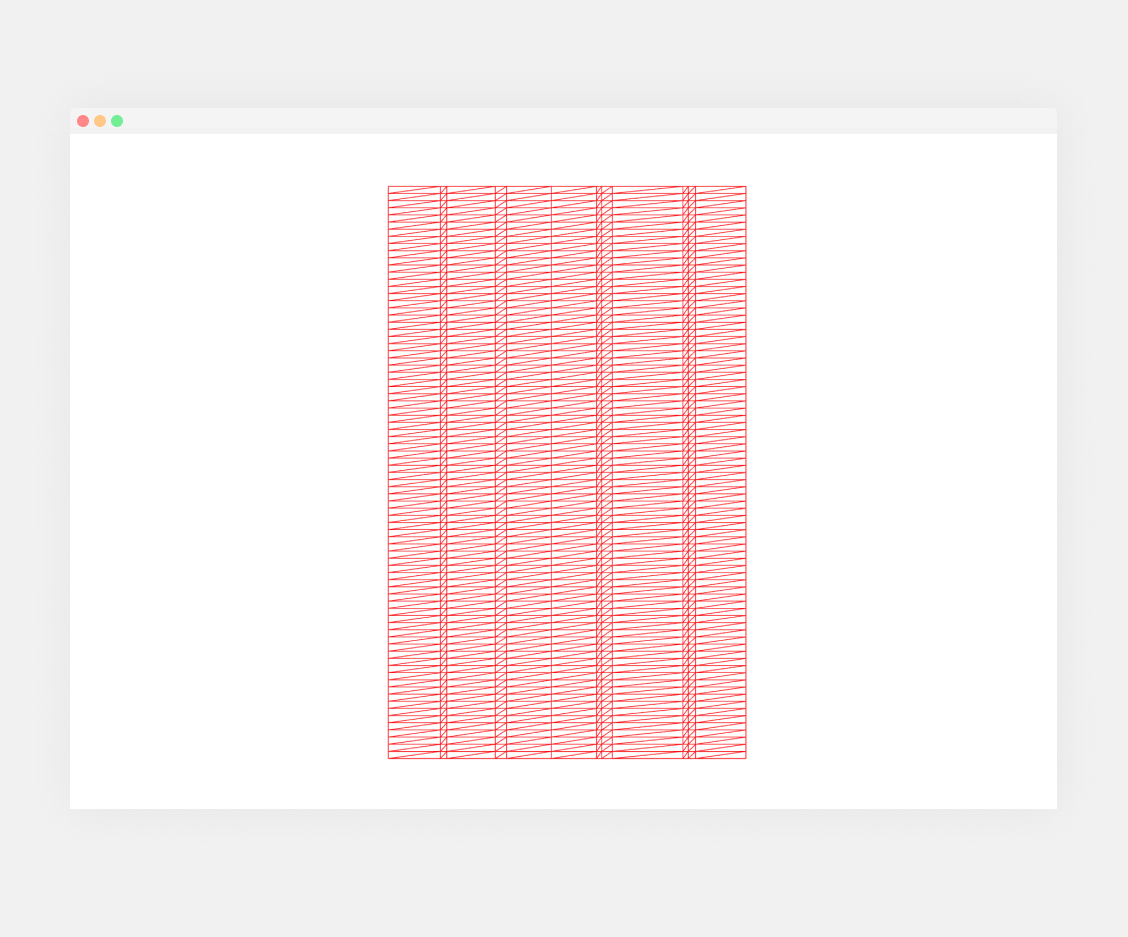
Now, there is just one step left, we have to set our row top. To take action, we simply want so as to add a rows prop as we did for columns and loop via it and on the high of the useMemo, we are able to divide our top by the variety of rows. Keep in mind to lastly push it to the temp as scaleY and use it within the useFrame.
const LygiaGrid = ({ width = 50, top = 86, columns = 12, rows = 10 }) => {
...
const squares = useMemo(() => {
    const temp = ();
    let x = 0;
    const row = top / rows;

    for (let i = 0; i  {
    for (let i = 0; i
Moreover, do not forget that our instanceMesh depend needs to be columns * rows:
In any case this, we are going to lastly see a rhythm of a extra random nature. Congratulations, you broke the grid:
Including Colour
Other than utilizing scale to interrupt our grid, we are able to additionally use one other indispensable component of our world; shade. To take action, we are going to create a palette in our grid and cross our colours to our situations. However first, we might want to extract the palette from the image. I simply used a handbook strategy; importing the picture into Figma and utilizing the eyedropper software, however you possibly can most likely use a palette extractor software:
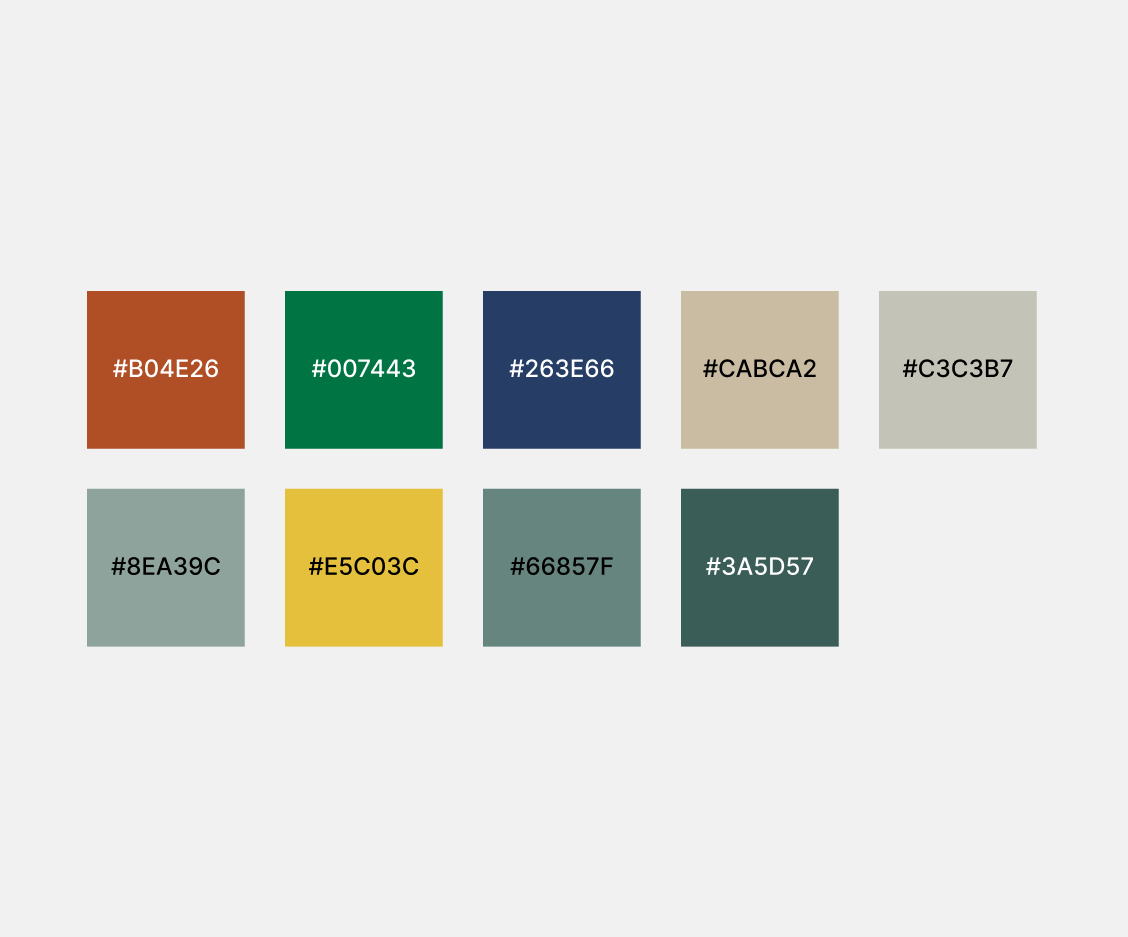
As soon as we now have our palette, we are able to convert it to a listing and cross it as a Element prop, this can develop into useful in case we wish to cross a unique palette from exterior the part. From right here we are going to use a useMemo once more to retailer our colours:
//...
import { Colour, MathUtils, Object3D } from "three";
//...
const palette =("#B04E26","#007443","#263E66","#CABCA2","#C3C3B7","#8EA39C","#E5C03C","#66857F","#3A5D57",)
const c = new Colour();
const LygiaGrid = ({ width = 50, top = 86, columns = 12, rows = 10, palette = palette }) => {
//...
const colours = useMemo(() => {
  const temp = ();

  for (let i = 0; i
As we did earlier than, let’s clarify level by level what is going on right here:
- Discover that we declared a
cfixed that equals a 3.jsColour. This can have the identical use because thedummy, however as an alternative of storing a matrix, we are going to retailer a shade. - We’re utilizing a
coloursfixed to retailer our randomized colours. - We’re looping once more via our
columnsandrows, so the size of our colours, might be equal to the size of our situations. - Inside the 2 dimension loop, we’re making a random variable referred to as
randthe place we’re utilizing once more ournoiseoperate. Right here, we’re utilizing ouriandjvariables from the loop. We’re doing this so we are going to get a smoother end result when deciding on our colours. If we multiply it by1.5it’s going to give us extra selection, and that’s what we wish. - The
colorIndexrepresents the variable that may retailer an index that may go from0to ourpalette.size. To take action, we map ourrandvalues once more from1and1to0andpalette.sizewhich on this case is9. - We’re flooring (rounding down) the worth, so we solely get integer values.
- Use the
cfixed tosetthe present shade. We do it by utilizingpalette(colorIndex). From right here, we use the three.js Colour methodologytoArray(), which is able to convert the hex shade to an(r,g,b)array. - Proper after, we push the colour to our
temparray. - When each loops have completed we return a
Float32Arraycontaining ourtemparray flattened, so we are going to get all the colours as(r,g,b,r,g,b,r,g,b,r,g,b...) - Now, we are able to use our shade array. As you possibly can see, it’s getting used contained in the
. The instanced buffer has twoprops, theconnect="attributes-color"andargs={(colours, 3)}. Theconnect="attributes-color"is speaking to the three.js inner shader system and might be used for every of our situations. Theargs={(colours, 3)}is the worth of this attribute, that’s why we’re passing ourcoloursarray and a3, which signifies it’s an array ofr,g,bcolours. - Lastly, as a way to activate this attribute in our fragment shaders we have to set
vertexColorsto true in our
As soon as we now have finished all this, we acquire the next end result:
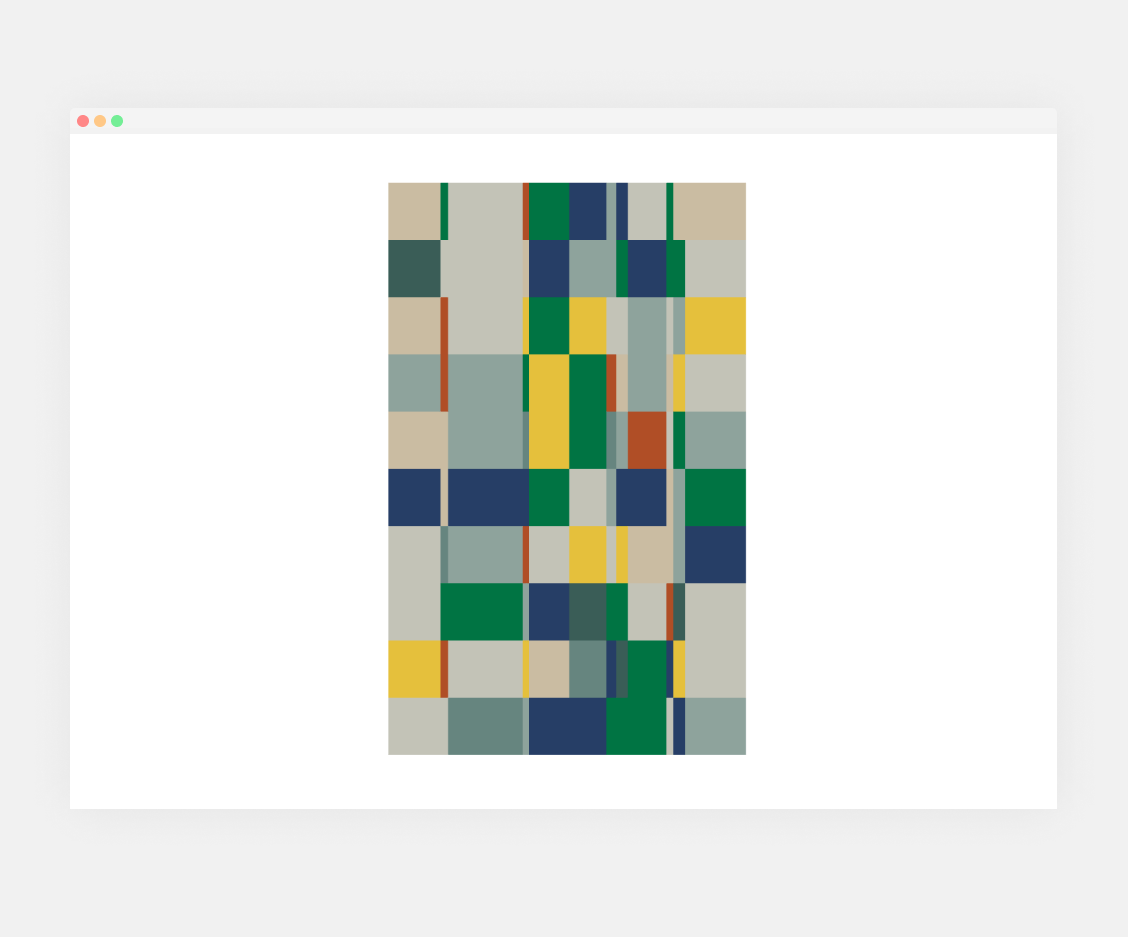
We’re very near our finish end result, however, if we verify the unique art work, we see that crimson isn’t utilized in wider columns, the alternative occurs to yellow, additionally, some colours are extra frequent in wider columns than smaller columns. There are various methods to resolve that, however one fast technique to clear up it’s to have two map features; one for small columns and one for wider columns. It’s going to look one thing like this:
const colours = useMemo(() => {
const temp = ();
for (let i = 0; i That is what is going on:
- If the present column is in
smallColumns, then, the vary that I wish to use from my palette is0to4. And if not, I would like from1(no crimson) to thepalette.size - 1. - Then, within the map operate, we cross this new array and unfold it so we acquire
0, 4, or1, palette.size - 1, relying on the logic that we select.
One factor to take note of is that that is utilizing fastened values from the palette. If you wish to be extra selective, you would create a listing with key and worth pairs. That is the end result that we obtained after making use of the double map operate:
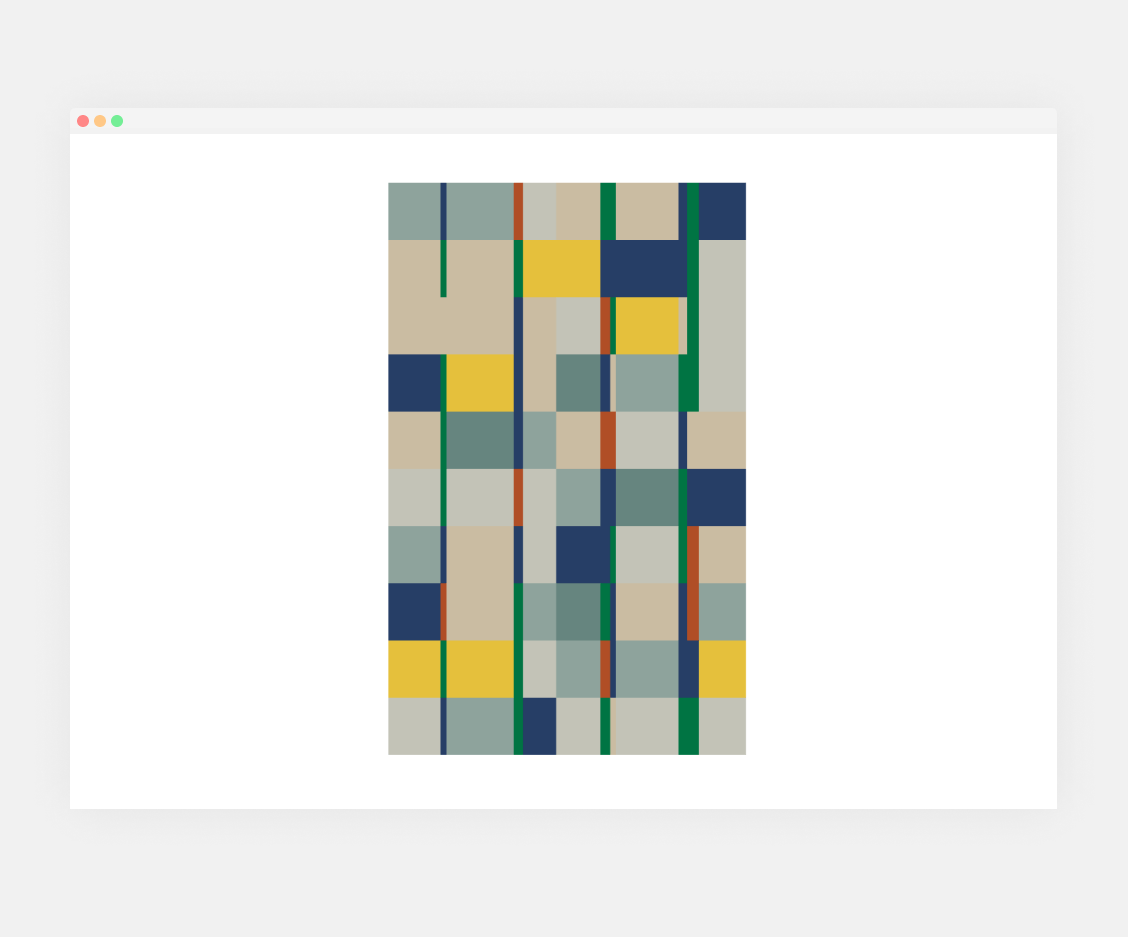
Now, you possibly can iterate utilizing totally different numbers within the makeNoise2D operate. For instance, makeNoise2D(10), gives you the above end result. Play with totally different values to see what you get!
Including a GUI
Among the finest methods to experiment with a generative system is by including a Graphical Person Interface (GUI). On this part, we’ll discover implement.
First, we might want to set up an incredible library that simplifies immensely the method; leva.
npm i levaAs soon as we set up it, we are able to use it like this:
import { Canvas } from "@react-three/fiber";
import { Lygia } from "./elements/Lygia";
import { useControls } from "leva";

operate App() {
	const { width, top } = useControls({
	  width: { worth: 50, min: 1, max: 224, step: 1 },
	  top: { worth: 80, min: 1, max: 224, step: 1 },
	});

  return (


  );
}

export default App;- We import the
useControlshook fromleva. - We use our hook contained in the app and outline the width and top values.
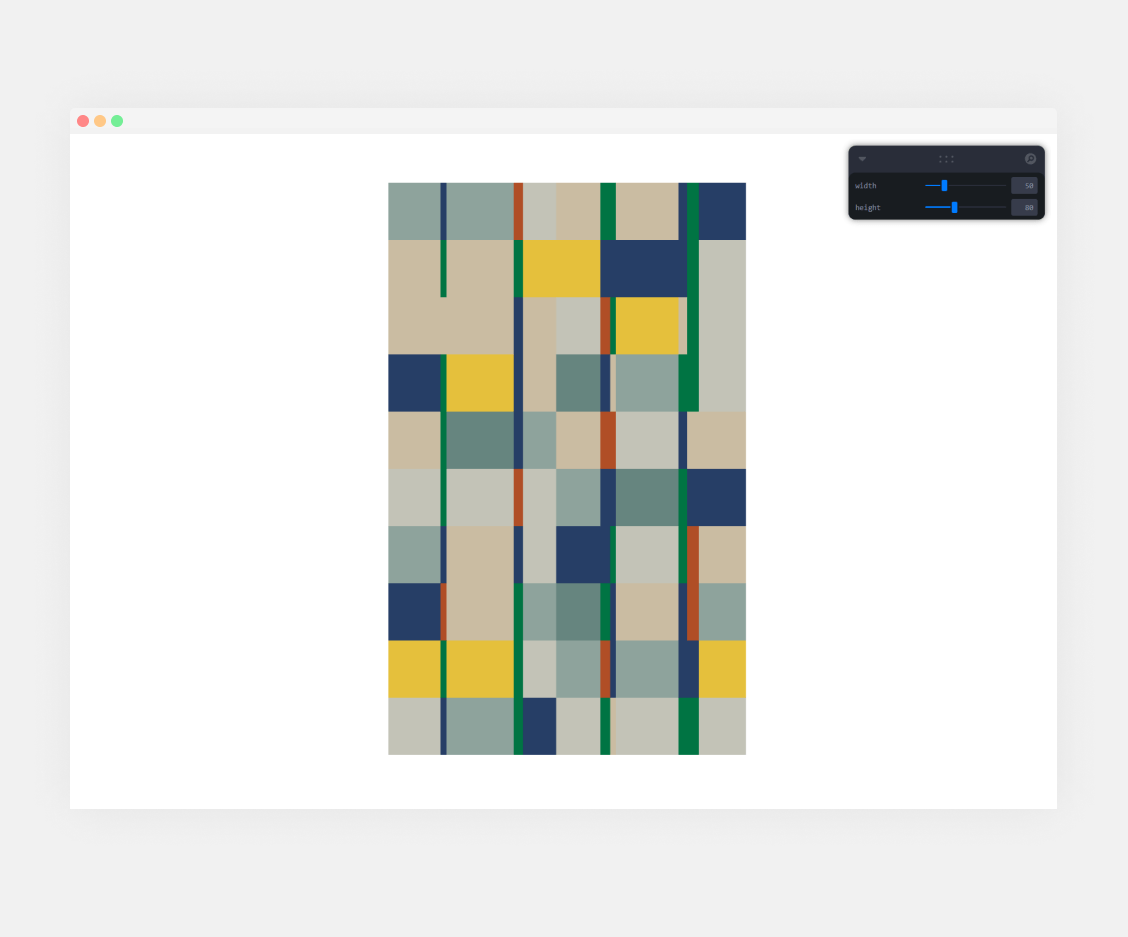
- Lastly, we cross our width and top to the props of our Lygia part.
On the highest proper of your display, you will notice a brand new panel the place you possibly can tweak our values utilizing a slider, as quickly as you modify these, you will notice the grid altering its width and/or its top.
Now that we all know the way it works, we are able to begin including the remainder of the values like so:
import { Canvas } from "@react-three/fiber";
import { Lygia } from "./elements/Lygia";
import { useControls } from "leva";

operate App() {
	const { width, top, columns, rows, color1, color2, color3, color4, color5, color6, color7, color8, color9 } = useControls({
    width: { worth: 50, min: 1, max: 224, step: 1 },
    top: { worth: 80, min: 1, max: 224, step: 1 },
    columns: { worth: 12, min: 1, max: 500, step: 1 },
    rows: { worth: 10, min: 1, max: 500, step: 1 },
    palette: folder({
      color1: "#B04E26",
      color2: "#007443",
      color3: "#263E66",
      color4: "#CABCA2",
      color5: "#C3C3B7",
      color6: "#8EA39C",
      color7: "#E5C03C",
      color8: "#66857F",
      color9: "#3A5D57",
    }),
  });

  return (


  );
}

export default App;
This appears like lots, however as the whole lot we did earlier than, it’s totally different. We declare our rows and columns the identical manner we did for width and top. The colours are the identical hex values as our palette, we’re simply grouping them utilizing the folder operate from leva. As soon as deconstructed, we are able to use them as variables for our Lygia props. Discover how within the palette prop, we’re utilizing an array of all the colours, the identical manner the palette is outlined contained in the part,
Now, you will notice one thing like the subsequent image:
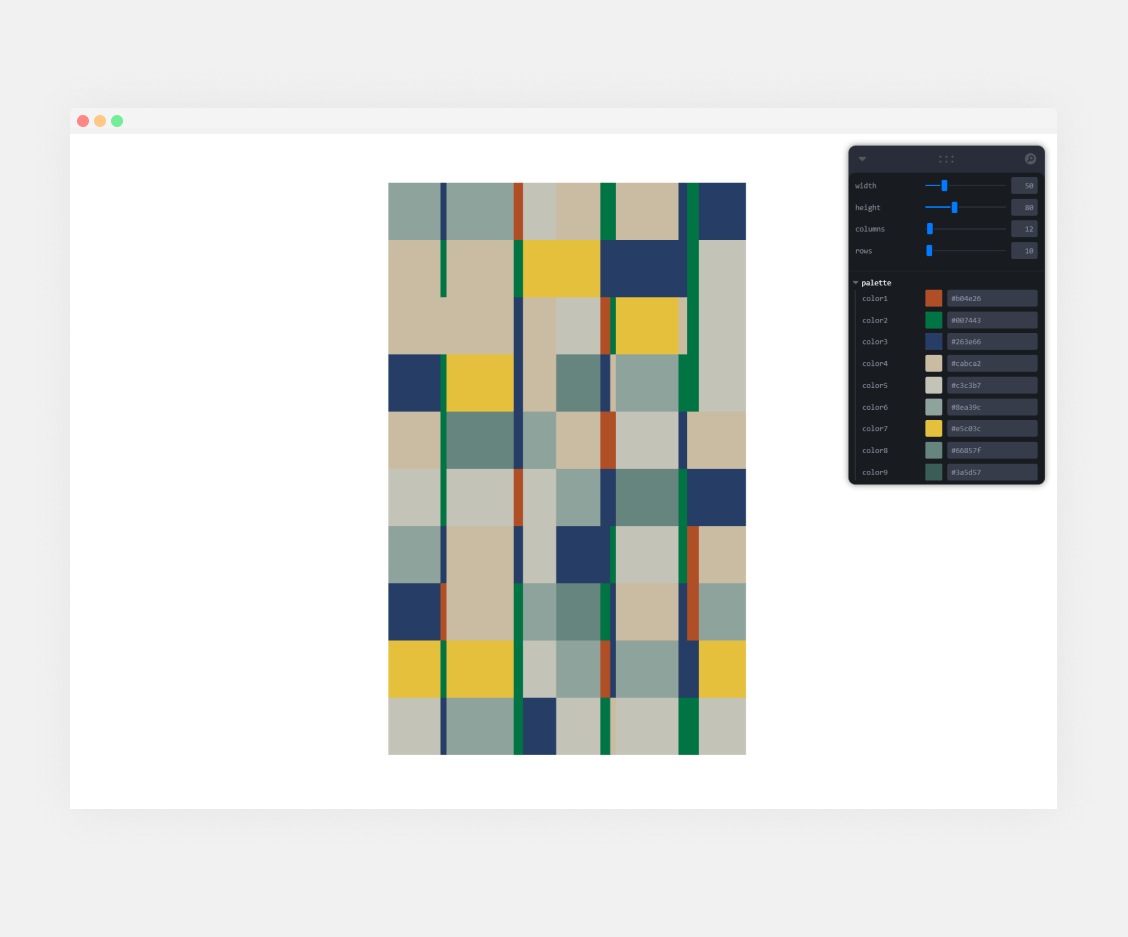
Superior! We will now modify our colours and our variety of columns and rows, however in a short time we are able to see an issue; instantly, our columns would not have the identical rhythm as earlier than. That’s taking place as a result of our small columns should not dynamic. We will simply clear up this downside by utilizing a memo the place our columns get recalculated when the variety of columns modifications:
const smallColumns = useMemo(() => {
	const baseColumns = (2, 4, 7, 8, 10, 11);

	if (columns  Math.flooring(Math.random() * (columns - 12)) + 13
	);

	return (...new Set((...baseColumns, ...additionalColumns))).kind(
	  (a, b) => a - b
	);
}, (columns));
Now, our generative system is prepared and full for use.
The place to go from right here
The great thing about a grid system is all the probabilities that it affords. Regardless of its simplicity, it’s a highly effective software that mixed with a curious thoughts will take us to infinity. As a observe, I like to recommend enjoying with it, discovering examples and recreating them, or creating one thing of your individual. I’ll share some examples and hopefully, you may as well get some inspiration from it as I did:
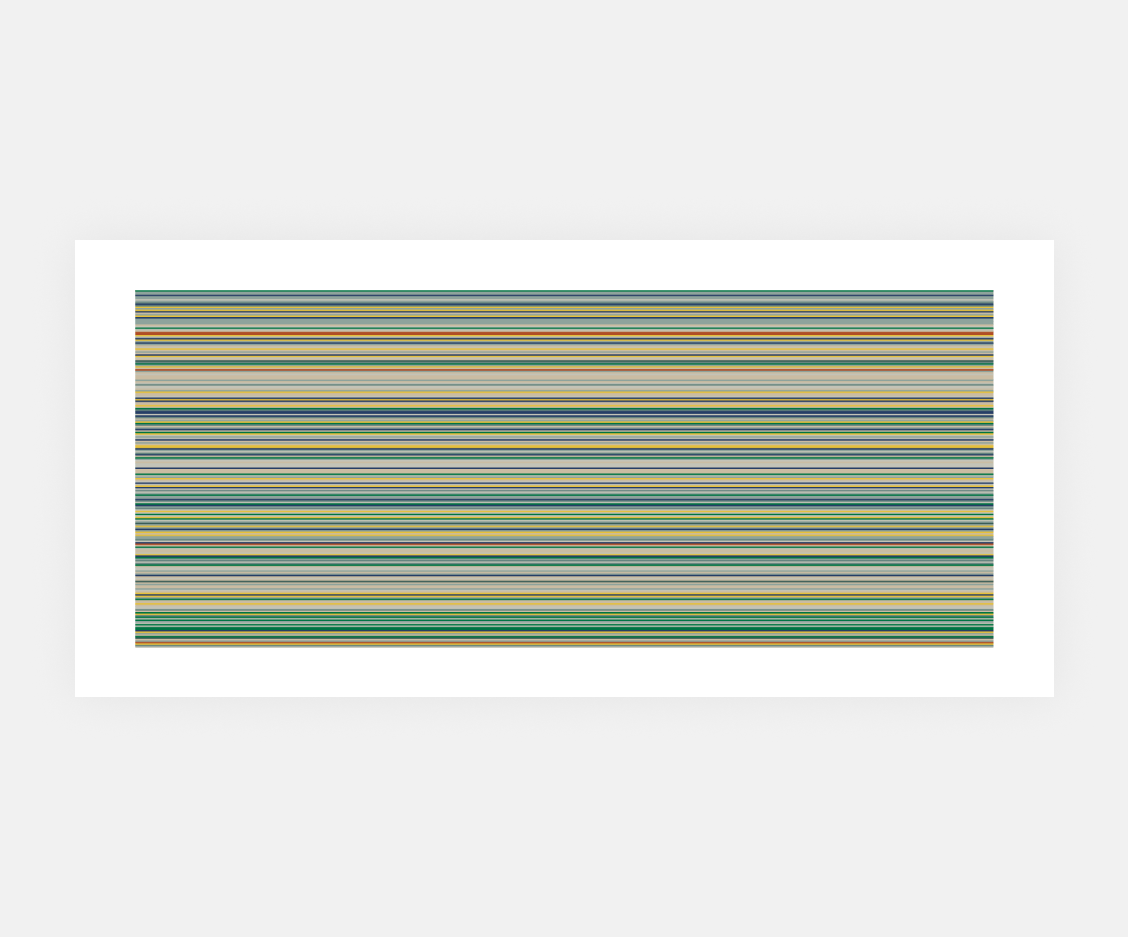
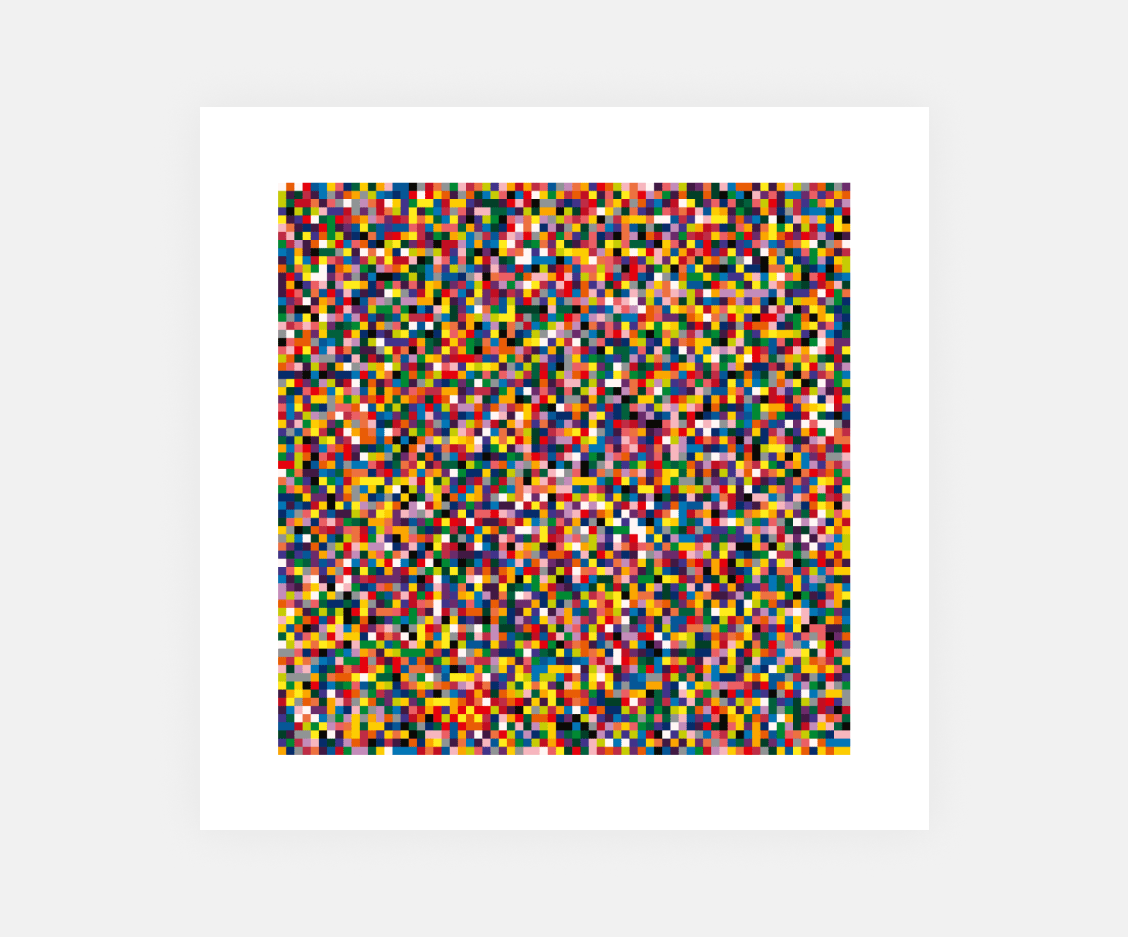
Gerhard Richter
If for instance, I create a boolean that takes out the randomness of the columns and modifications the colour palette I can get nearer to a few of Gerard Richter’s summary works:
Getting into the third dimension
We might use shade to symbolize depth. Blue represents distance, yellow signifies proximity, and crimson marks the beginning place. Artists from the De Stijl artwork motion additionally explored this method.

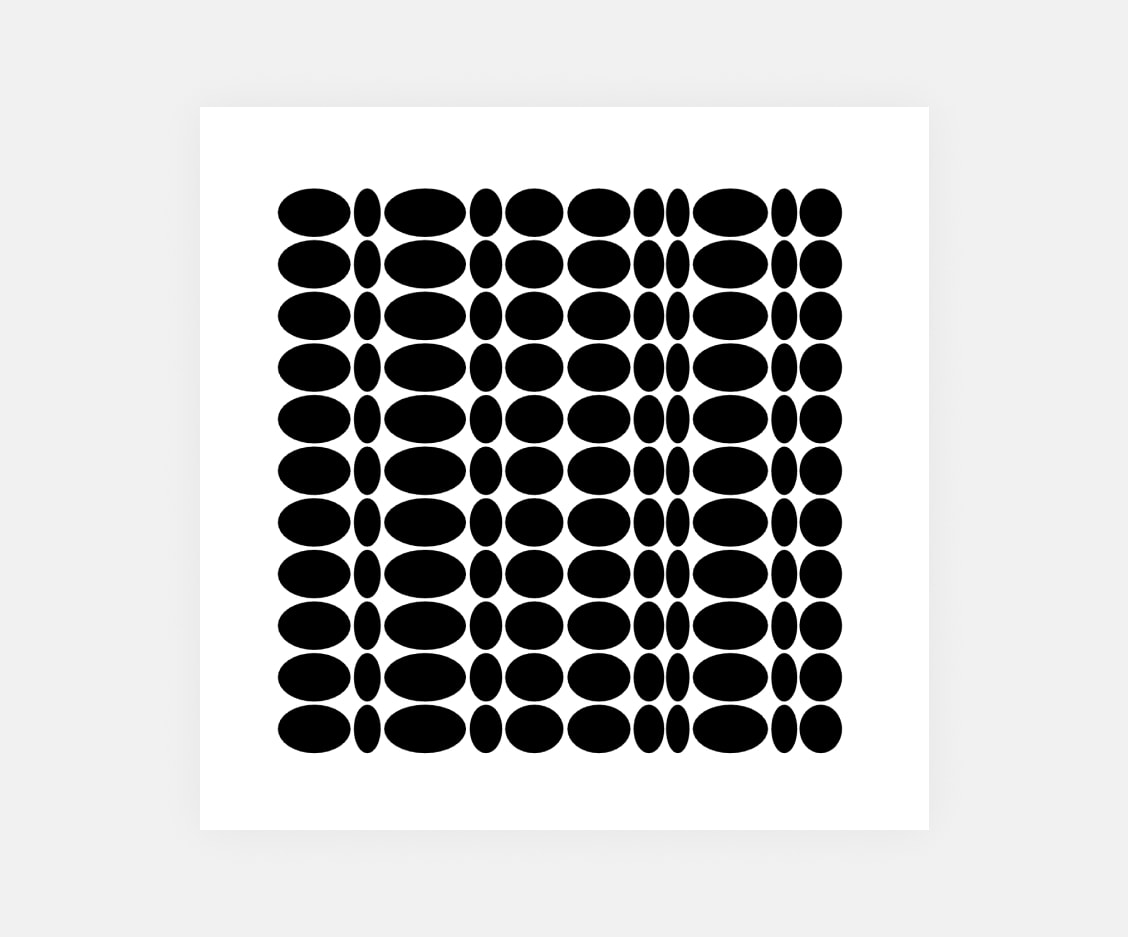
Different components
What about incorporating circles, triangles, or strains? Maybe textures? The chances are infinite—you possibly can experiment with varied artwork, design, science, or arithmetic components.
Conclusions
On this article, we now have had the thrilling alternative to recreate Lygia Clark’s art work and discover the infinite potentialities of a grid system. We additionally took a more in-depth take a look at what a grid system is and how one can break it to make it uniquely yours. Plus, we shared some inspiring examples of artworks that may be recreated utilizing a grid system.
Now, it’s your flip! Get inventive, dive in, and take a look at creating an art work that speaks to you. Modify the grid system to suit your fashion, make it private, and share your voice with the world! And when you do, please, share it with me on X.